Flow cytometry protocol

Stage 1. Sample preparation
First, we should harvest our cells or tissue and prepare a single-cell suspension. We will then transfer our single-cell suspension into 96-well plates, test tubes, or polystyrene round bottom tubes, depending on the number of cells and volumes being used.
Materials required:
-Cell suspension
-Polystyrene round bottom 12 x 75 mm2 Falcon tubes/96-well plate (or any container compatible with your centrifuge)
-Suspension/washing buffer (PBS, 5-10% fetal cell serum (FCS))
-Optional - red blood cell lysis buffer (for example, R377982 )
Steps
Time needed 20 mins approx.
1 Harvest and wash cells according to the manufacturer’s guidance.
1.1 For blood samples, we suggest incubating samples with RBC lysis buffer (example, R377982) before proceeding.
Tip 1: A red blood cell lysis buffer will lyse red blood cells, which might interfere with the analysis of leukocytes (nucleated cells).
Tip 2: Prevent cell damage by avoiding bubbles, vigorous vortexing, aspirating the entire solution during buffer exchange, and excessive centrifugation.
2 Determine the total cell number and check cell viability.
2.1 In general, viability should be 90–95%.
3 Spin down and resuspend cell samples in an ice-cold suspension buffer.
3.1 Centrifuge at ~200 g for 5mins at 4°C,
3.2 Recommended cell concentration for suspension: 0.5–1×10⁶ cells/mL.
Tip: Spin times and speeds may require optimization. In general, cells should be centrifuged sufficiently so the supernatant fluid can be removed with little loss of cells but not so hard that the cells are difficult to resuspend.
Warning: Higher cell concentrations might clog up the flow cytometer system and affect resolution.
4 Proceed to stain with a viability dye.
Stage 2. Live/dead staining with a viability dye
DNA binding dyes, such as 7-AAD, DAPI, and TOPRO3, are often used as viability dyes for live/dead staining, as they cannot penetrate the cell membrane of live cells. The compromised cell membrane found in dead cells allows these dyes access to DNA, to which they bind and emit fluorescence.
However, these dyes cannot be used for live/dead staining with fixed cells, where cell membranes would be compromised in all cells. In this case, we must use amine-reactive fixable cell viability dyes.
Materials required:
-Viability dye
-Examples of non-fixable dyes: 7-AAD, DRAQ-5 (D266292), DRAQ-7 (D266297), or DAPI (D609734)
-Fixable dyes
-Suspension/wash buffer (example:PBS, 5-10% fetal cell serum (FCS))
Steps
1 Stain cells with a viability dye.
1.1 Incubate cells with dye in the dark at 4°C, according to the manufacturer’s instructions.
Warning: Keep fluorophores in the dark to avoid photobleaching.
Tip: Choose a dye with an emission spectrum that does not overlap with the fluorophores used for immunostaining.
2 Wash cells two times with a wash buffer.
2.1 Spin cells down (200g, 5mins, 4°C), remove the supernatant, and resuspend the pellet after each wash.
Tip: The number of wash steps, spin time, and speed may require optimization. One wash step may suffice when using excess wash buffer and removing as much liquid as possible after centrifugation.
3 Proceed to blocking when detecting extracellular targets or to fixation and permeabilization for intracellular targets.
Stage 3. Fixation and permeabilization - only for intracellular staining
When staining intracellular targets, we must proceed with additional fixation and permeabilization steps. Fixation is required to preserve the structure of intracellular proteins. Permeabilization disrupts the cell membrane, allowing antibodies to enter the cell and stain intracellular targets.
When staining extracellular targets, we’ll proceed immediately to the blocking step. When analyzing intracellular and extracellular targets together, we'll perform cell surface staining (see Stage 5) before fixation and permeabilization.
Useful tips for selecting appropriate fixation and permeabilization methods for intracellular staining:
-Antigens close to the plasma membrane and soluble cytoplasmic antigens will require mild cell permeabilization without fixation.
-Cytoskeletal, viral, and some enzyme antigens usually most effective when fixed with a high concentration of acetone, alcohol, or formaldehyde.
-Antigens in cytoplasmic organelles and granules require different fixation and permeabilization method, depending on the antigen.
-The epitope must remain accessible.
Materials required:
-Cell suspension
-Suspension buffer (PBS, 5-10% FCS)
-Fixative (example 1-4% paraformaldehyde, 90% methanol, or acetone)
-Permeabilization solution (for example, Triton X-100, NP-40 or Saponin)
-Alternatively, you can use our fixation and permeabilization kit for flow cytometry, which is suitable for most sample types.
Steps
Time needed 1hour and 15mins approx.
1 Fix the cells in your chosen fixative.
1.1 Spin down cells to a pellet (200g, 5mins, 4°C), discard the supernatant, and resuspend the pellet in fixative.
1.2 Incubate cells with the fixative as indicated below.
Tip: The fixation will require optimization for different antigens. Some epitopes are very sensitive to methanol, so try acetone instead if any issues are occurring with detection.
|
2 Wash cells two times with suspension buffer.
2.1 Spin down cells to a pellet (200g, 5mins, 4°C), discard the supernatant, and resuspend the pellet in wash buffer.
Tip: The number of wash steps, spin time, and speed may require optimization. One wash step may suffice when using excess wash buffer and removing as much liquid as possible after centrifugation.
3 Permeabilize cells by incubating them with a suitable detergent.
3.1 Spin down cells to a pellet (200g, 5mins, 4°C), discard the supernatant, and resuspend the pellet in a detergent solution.
3.2 Incubate cells in the detergent for 10-15 mins at room temperature.
3.3 Note: this step is not required if acetone has been used as a fixative, as acetone also permeabilizes cells.
|
Tip1: The optimal detergent will depend on the protein and its localization. Harsh detergents (Triton or NP-40), partially dissolve the nuclear membrane and are suitable for nuclear antigen staining. In contrast, mild detergents, such as Tween20 or saponin, enable antibodies to go through pores without dissolving the plasma membrane, which makes them suitable for antigens in the cytoplasm or cytoplasmic face of the plasma membrane and soluble nuclear antigens.
Tip2: The concentration of detergent should be optimized for your samples.
Tip3: Permeabilization will affect the light scatter profiles of the cells on the flow cytometer; keep that in mind when gating cell populations during the detection and data analysis (Stage 6).
4 Wash cells two times with suspension buffer.
4.1 Spin down cells to a pellet (200g, 5mins, 4°C), discard the supernatant, and resuspend the pellet in the wash buffer.
Tip: The number of wash steps, spin time, and speed may require optimization. One wash step may suffice when using excess wash buffer and removing as much liquid as possible after centrifugation.
5 Proceed to blocking.
Stage 4. Blocking
Blocking proteins and Fc domains is essential to prevent the non-specific binding of antibodies to cells.
Materials required:
-The choice of materials will depend on the type of cells and the secondary antibody used
-FcR blocking buffer (for example, 2-10 % goat serum, human IgG, or mouse anti-CD16/CD32)
-Suspension buffer (PBS, 5-10% FCS)
Steps
Time needed 45mins approx.
1 Block Fc receptors with a blocking buffer.
1.1 Spin down cells to a pellet (200g, 5mins, 4°C), discard the supernatant, and resuspend the pellet in the blocking buffer.
1.2 Incubate cells with one of buffers below for 30-60 mins in the dark at 4°C.
2 Wash cells two times with a wash buffer.
2.1 Spin cells down (200g, 5mins, 4°C), remove the supernatant, and resuspend the pellet after each wash.
Tip: The number of wash steps, spin time, and speed may require optimization. One wash step may suffice when using excess wash buffer and removing as much liquid as possible after centrifugation.
3 Proceed to antibody incubation.
Stage 5: Antibody incubation
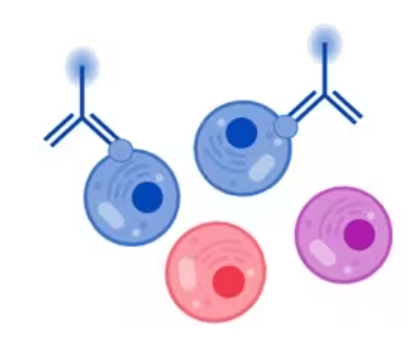
We're now ready to stain cells with fluorophore-conjugated antibodies for indirect or direct detection in the flow cytometer.
The above steps can also be used for multicolor flow cytometry, which involves using multiple sets of fluorophore-conjugated antibodies against different targets. It is important to minimize the overlap of the fluorophores' emission spectra when using multiple sets of antibodies.
Direct antibody labeling
Materials required:
-Conjugated primary antibody
-Samples (cell suspension at 0.5-1 x 10⁶ cells/mL)
-Suspension buffer (PBS, 5-10% FCS)
Steps
Time 40 mins approx.
1 Dilute the conjugated primary antibody in the suspension buffer.
1.1 Suggested dilutions for each antibody will often be provided on the datasheet.
Tip: Titrating the antibody by performing serial dilutions will help find the antibody concentration that works best for your experiment.
2 Incubate cells in the pre-diluted primary antibody.
2.1 Spin down cells to a pellet (200g, 5mins, 4°C), discard the supernatant, and resuspend the cells in the primary antibody solution.
2.2 Incubate in the dark for 20-30 min at 4°C. Fixed cells can be incubated at room temperature or 4°C.
Tip: This step may require optimization.
Warning: Keep fluorophores in the dark to avoid photobleaching.
3 Wash cells two times with the suspension buffer.
3.1 Spin cells down (200g, 5mins, 4°C), remove the supernatant, and resuspend the pellet after each wash.
3.2 Tip: The number of wash steps, spin time, and speed may require optimization. One wash step may suffice when using excess wash buffer and removing as much liquid as possible after centrifugation. .
4 Proceed to detection in the flow cytometer as soon as possible.
4.1 If cells are not analyzed in the flow cytometer immediately after antibody staining (within 1 hour) and were not fixed earlier, stained cells can be fixed at this step (1-4% PFA, 20mins at 4°C). Fixation helps preserve the cells for several days, stabilizing the light scatter and inactivating most biohazardous agents. The controls will require fixation using the same procedure. Note that fixation will kill cells and won't be compatible with non-fixable cell viability dyes (if those were used previously).
4.2 After fixation, wash cells three times and store cell suspension in the suspension buffer.
4.3 Follow the manufacturer’s instructions.
Tip: Keep the cells in the dark on ice or at 4°C in a fridge until your scheduled analysis time.
Indirect antibody labeling
Indirect labeling involves two incubation steps: first with a primary antibody and then with a compatible secondary antibody. The fluorescent dye (FITC, PE, Cy5®, etc.) is conjugated to the secondary antibody, not the primary antibody.
Materials required:
-Promary antibody
-Conjugated secondary antibody.
-Samples (cell suspension at 0.5-1x10⁶ cells/mL)
-Suspension/ wash buffer (PBS, 5-10% FCS)

Steps
Time 1hour 15mins approx.
1 Dilute the primary and secondary antibodies in the suspension buffer.
1.1 Suggested dilutions for each application will often be provided on the antibody datasheet.
Tip: Titrating the antibody by performing serial dilutions will help find the antibody concentration that works best for your experiment.
2 Incubate cells in the pre-diluted primary antibody.
2.1 Spin down cells to a pellet (200g, 5mins, 4°C), discard the supernatant, and resuspend the pellet in the primary antibody solution.
2.2 Incubate in the dark for 20-30 mins at 4°C. Fixed cells can be incubated at room temperature or 4°C.
Tip: Incubation time may need to be optimized.
3 Wash cells two times with the suspension buffer.
3.1 Spin cells down (200g, 5mins, 4°C), remove the supernatant and resuspend the pellet after each wash.
3.2 Tip: The number of wash steps, spin time, and speed may require optimization. One wash step may suffice when using excess wash buffer and removing as much liquid as possible after centrifugation.
4 Incubate cells in the pre-diluted secondary antibody.
4.1 Spin down cells to a pellet (200g, 5mins, 4°C), discard the supernatant, and resuspend the pellet in the secondary antibody solution.
4.2 Incubate in the dark for 20-30 min It’s important to keep fluorophores in the dark to avoid photobleaching.
5 Wash cells two times with the wash buffer.
5.1 Spin down cells to a pellet (500g, 5mins, 4°C), discard the supernatant, and resuspend the pellet in the wash buffer.
5.2 Tip: The number of wash steps, spin time, and speed may require optimization. One wash step may suffice when using excess wash buffer and removing as much liquid as possible after centrifugation.
6 Proceed to detection in the flow cytometer as soon as possible.
6.1 If cells are not analyzed in the flow cytometer immediately after antibody staining (within 1 hour) and were not fixed earlier, stained cells can be fixed at this step (1-4% PFA, 20 mins at 4°C). Fixation helps preserve the cells for several days, stabilizing the light scatter and inactivating most bio-hazardous agents. The controls will require fixation using the same procedure. Note that fixation will kill cells and won't be compatible with non-fixable cell viability dyes (if those were used previously).
Tip: The best results are obtained immediately after incubation.
Warning: Do not fix cells if you intend to study them live.
6.2 After fixation, wash cells three times and store cell suspension in the suspension buffer.
6.3 Follow the manufacturer’s instructions for data acquisition.
Tip: Keep the cells in the dark on ice or at 4°C in a fridge until your scheduled analysis time.
Stage 6. Detection and data analysis
After incubating the antibodies, the experiment can be conducted using the flow cytometer. It is important to refer to the manufacturer's instructions as the procedure may vary depending on the equipment used.

When surface-stained cells are live and not fixed or permeabilized, they can be separated using fluorescence-activated cell sorting (FACS). With FACS, live cells can be sorted into distinct populations based on their properties. We can then perform downstream analyses on the separated cells.

For more information, check out our online website designed to help you get the best possible data from your cells.
References
Nguyen R, Perfetto S, Mahnke YD, Chattopadhyay P & Roederer M. Quantifying spillover spreading for comparing instrument performance and aiding in multicolor panel design. Cytometry A 2013;83(3):306-315.
Kalina, T., Lundsten, K. and Engel, P. (2020), Relevance of Antibody Validation for Flow Cytometry. Cytometry A, 97: 126-136.